No bake Nutella cheesecake Recipe
If you are a fan of rich, creamy desserts and the irresistible flavor of Nutella, then you are going to absolutely love this No bake Nutella cheesecake. This luscious cheesecake brings together a crunchy Oreo crust, a velvety Nutella-infused filling, and a beautiful silky texture without ever needing to turn on the oven. It’s a dream dessert that’s perfect for those who crave something indulgent yet easy to prepare, making it an instant favorite to whip up for any occasion or just because you deserve a special treat.
Ingredients You’ll Need
This recipe is deceptively simple, relying on just a handful of essential ingredients that each add something special to the No bake Nutella cheesecake’s final masterpiece. Every component plays a crucial role, from the buttery Oreo crust that gives the perfect crunch to the smooth, creamy Nutella filling that simply melts in your mouth.
- Oreos (200 grams, around 18 whole): Crushed to create the unbeatable chocolatey crust with just the right amount of crunch and flavor.
- Melted butter (45 grams): Binds the Oreo crumbs together into a firm, buttery base that holds its shape.
- Cream cheese (500 grams): Provides that classic cheesecake creaminess and tanginess that balances the sweetness.
- Nutella (200 grams for filling + 150 grams for freezing + extra for decorating): The star ingredient, giving the cheesecake its signature hazelnut and chocolate taste.
- Powdered sugar (50 grams): Adds sweetness without grit, helping the texture stay silky smooth.
- Heavy whipping cream (200 grams, 35% fat): Whipped to light peaks for a fluffy, airy filling that feels like cloud nine.
- Oreos (4 whole, crushed for garnish): Adds a visually stunning and tasty finishing touch to the top and sides of the cheesecake.
How to Make No bake Nutella cheesecake
Step 1: Prepare the Nutella Disk
Before diving into the cheesecake itself, start by creating a Nutella disk that will add a magical swirl to the center of the cake. Scoop 150 grams of Nutella onto a sheet of parchment paper and spread it into an even circle roughly the size of your cake pan. Carefully slide it into the freezer to set. This nifty trick lets you easily layer Nutella within the cake without it melting away.
Step 2: Prepare the Oreo Crust
Crush your Oreos finely using a food processor or by placing them in a ziplock bag and rolling a pin over until you have crumbly “wet sand.” Mix these crumbs with the melted butter until well incorporated. Press the mixture firmly and evenly into the bottom of your springform pan to make a sturdy and delicious base that will hold your cheesecake perfectly.
Step 3: Make the Nutella Cheesecake Filling
Combining flavors and textures is the magic behind this recipe. Start by whisking together the cream cheese and 200 grams of Nutella until smooth and creamy. In a separate bowl, whip the heavy cream and powdered sugar until soft peaks form—watch closely to get that perfect airy texture without overwhipping. This whipped cream is what gives the cheesecake its lightness and silkiness.
Step 4: Combine the Filling
Now, gently fold the whipped cream into the Nutella and cream cheese mixture in two batches. Folding (rather than mixing) helps maintain the fluffy texture. Use a spatula to carefully combine until you have a light, luscious filling that’s velvety smooth and beautifully airy.
Step 5: Assemble the Cheesecake
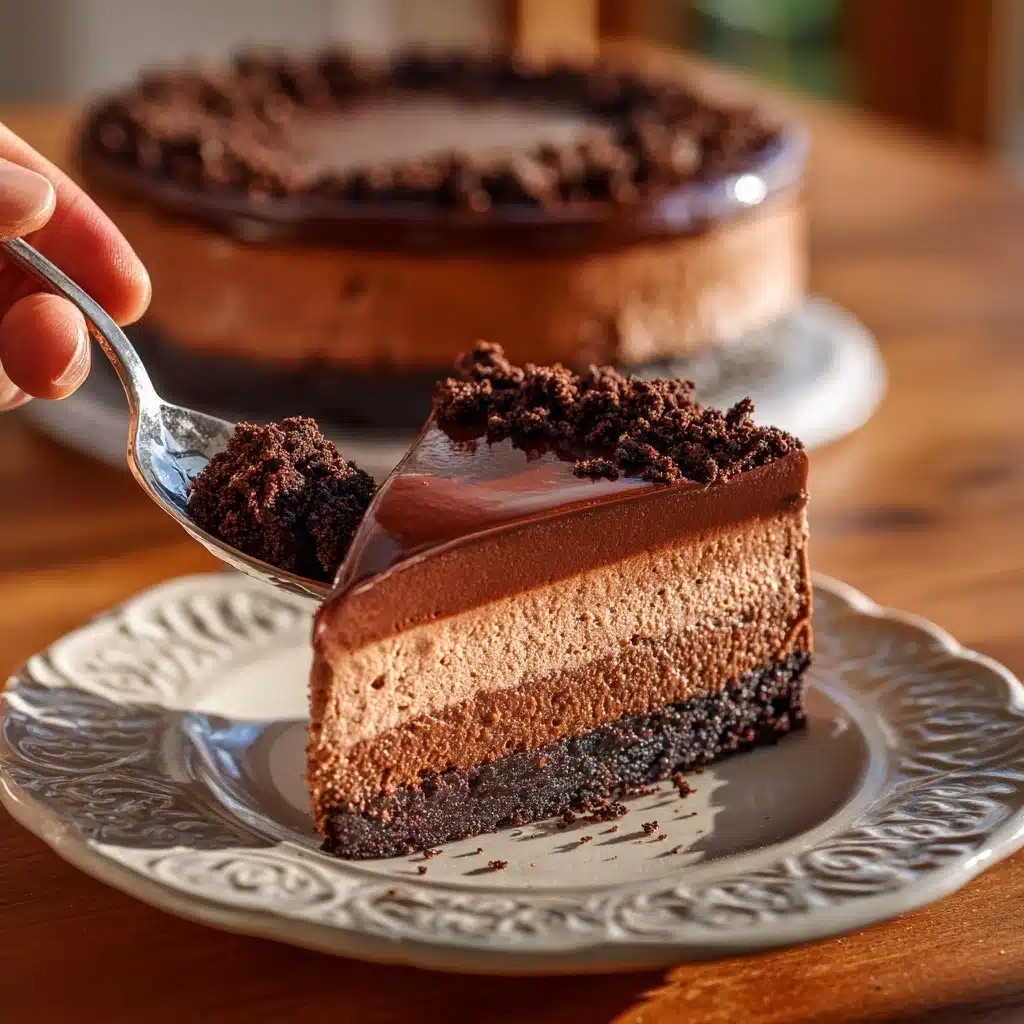
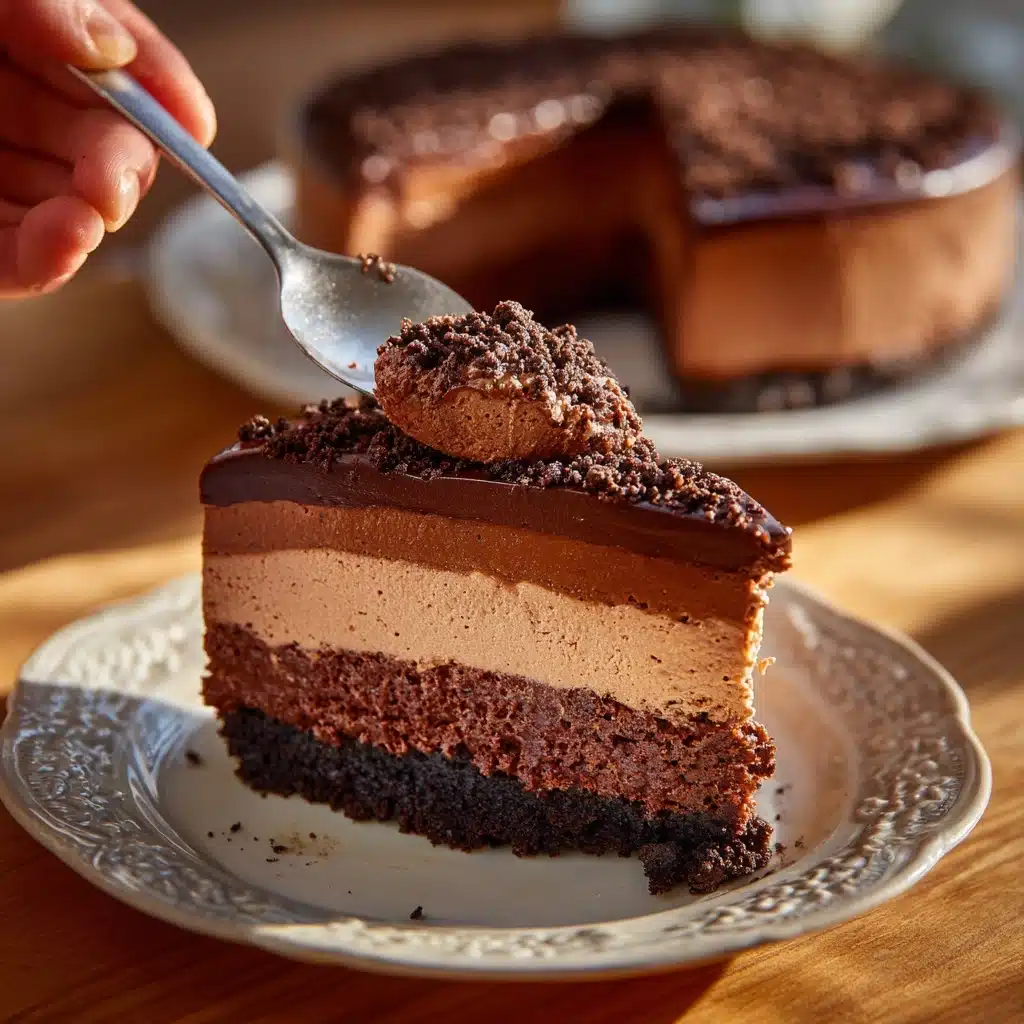
Layer half of this luscious filling over your Oreo crust, spreading it evenly. Next, place the frozen Nutella disk in the center, and then cover it with the remaining filling. Smooth the top with a spatula for an even finish. This layering technique creates a visually stunning surprise once you slice into the cake.
Step 6: Chill the Cheesecake
Cover the pan with plastic wrap or place a baking tray on top to shield your cheesecake from any fridge odors. Chill it for at least 8 hours, or better yet, overnight. This resting time allows the cheesecake to firm up and the flavors to meld into that perfect creamy harmony.
Step 7: Decorate with Nutella and Oreos
Once set, melt some extra Nutella and drizzle it in a beautiful, glossy layer on top of the cheesecake. Tilt the pan gently so the Nutella evenly covers the surface. Sprinkle crushed Oreo biscuits around the edges for added texture and a visually stunning finish that also ups the chocolate factor.
Step 8: Slice and Serve
Carefully remove the cheesecake from the springform pan and serve immediately. Each slice offers a creamy, crunchy, chocolate-hazelnut bite that’s truly irresistible. This no bake Nutella cheesecake is sure to have everyone asking for seconds.
How to Serve No bake Nutella cheesecake
Garnishes
Besides the Oreo crumbs and Nutella drizzle, consider topping slices with whipped cream rosettes or a sprinkle of chopped toasted hazelnuts for an added crunch and nutty aroma that complements the Nutella perfectly.
Side Dishes
This cheesecake pairs delightfully with a light dessert wine or a fresh raspberry coulis that cuts through the richness with a hint of tartness. Fresh berries or a scoop of vanilla bean ice cream are also excellent companions.
Creative Ways to Present
Try serving individual portions in clear glasses layered with crushed Oreos and dollops of Nutella for a stunning parfait effect. Or even use mini springform pans for perfectly portioned cheesecake gifts that’ll wow friends and family.
Make Ahead and Storage
Storing Leftovers
Keep your leftover No bake Nutella cheesecake tightly covered in the refrigerator in an airtight container. It will stay fresh and delicious for up to four days, so you can indulge a little longer without losing any of its silky goodness.
Freezing
If you want to save your cheesecake for a longer time, slices freeze beautifully. Wrap each piece individually in plastic wrap and place them in a freezer-safe container or bag. Frozen cheesecake can keep for up to three months. Thaw slices overnight in the fridge before serving for the best texture.
Reheating
Since this is a no bake cheesecake, reheating isn’t necessary; it’s best enjoyed chilled. If you prefer, you can let slices sit at room temperature for 10-15 minutes to soften slightly before serving, which helps bring out the rich flavors even more.
FAQs
Can I use a different type of cookie for the crust?
Absolutely! While Oreos bring that classic chocolate flavor and crunch, you can swap them for graham crackers, digestive biscuits, or even peanut butter cookies for a fun twist. Just be sure to adjust the butter amount slightly if the cookie crumbs are drier or more absorbent.
Do I have to use heavy whipping cream?
Heavy whipping cream is key for getting that perfectly fluffy texture in the filling. Lower-fat creams won’t whip as well and may result in a denser cheesecake, so it’s best to stick with heavy cream for optimal results.
Can I make this cake vegan or dairy-free?
Making a vegan version would require several substitutions like dairy-free cream cheese and whipped coconut cream, as well as vegan Nutella alternatives. While possible, the texture and flavor will differ significantly from the original recipe.
How firm will the cheesecake be since it’s no bake?
This cheesecake has a wonderfully creamy, mousse-like consistency that holds together nicely thanks to the chilled setting time. It won’t be as firm as a baked cheesecake but offers a silky texture that melts in your mouth.
Is it okay if the Nutella disk melts before assembling?
It’s best to keep the Nutella disk frozen until assembly to maintain distinct layers and prevent it from mixing into the filling prematurely. If it softens, pop it back in the freezer quickly to firm up again before layering.
Final Thoughts
Making a No bake Nutella cheesecake is like giving yourself a gift of creamy, chocolatey bliss without the fuss of baking. Whether you’re treating yourself or sharing with loved ones, this recipe delivers a crowd-pleasing dessert that’s as stunning as it is delicious. So grab your ingredients, dive in, and watch this luscious cheesecake become your new go-to indulgence!
PrintNo bake Nutella cheesecake Recipe

This no-bake Nutella cheesecake is a luscious, creamy dessert combining the rich hazelnut flavor of Nutella with a crunchy Oreo crust. Perfect for chocolate lovers, it requires no baking, just chilling, making it a simple yet indulgent treat for any occasion.
- Prep Time: 20 minutes
- Cook Time: 0 minutes
- Total Time: 8 hours 20 minutes (including chilling time)
- Yield: 8 servings 1x
- Category: Dessert
- Method: No-Bake
- Cuisine: American
- Diet: Vegetarian
Ingredients
Oreo Crust
- 200 grams Oreos (about 18 whole Oreo cookies)
- 45 grams melted butter
Cheesecake Filling
- 500 grams cream cheese, room temperature
- 200 grams Nutella
- 50 grams powdered sugar
- 200 grams heavy whipping cream (35% fat)
Nutella Disk
- 150 grams Nutella (for the frozen disk)
Decoration
- Additional melted Nutella for drizzling
- 4 Oreos, crushed (only the biscuit part)
Instructions
- Prepare the Nutella Disk: Line a flat surface with parchment paper. Spread 150 grams of Nutella into a smooth, even circle roughly the size of your cake pan. Slide the parchment paper with the Nutella into the freezer and let it firm up until needed.
- Prepare the Oreo Crust: Crush the Oreos into fine crumbs using a food processor or place them in a ziplock bag and crush with a rolling pin. Combine the crumbs with melted butter until the mixture resembles wet sand. Press firmly and evenly into the bottom of a springform or cake pan.
- Make the Cheesecake Filling: In a large bowl, whisk or beat together the cream cheese and 200 grams Nutella until smooth and creamy. Separately, whip the heavy cream with powdered sugar until soft peaks form, taking care not to overwhip.
- Combine the Filling: Gently fold half of the whipped cream into the Nutella and cream cheese mixture until almost combined. Add the remaining whipped cream and fold carefully until the filling is light, fluffy, and fully combined.
- Assemble the Cheesecake: Spread half of the filling evenly over the Oreo crust. Place the frozen Nutella disk in the center, then spread the remaining filling over the top, smoothing the surface with a spatula.
- Chill the Cheesecake: Cover the assembled cheesecake with plastic wrap or a baking tray to prevent odors and chills well in the refrigerator for at least 8 hours or overnight until fully set.
- Decorate: Once set, melt additional Nutella and drizzle it evenly over the top of the cheesecake. Crush a few Oreos (removing the cream filling) and sprinkle the biscuit pieces on the sides for a decorative and flavorful finish.
- Slice and Serve: Carefully remove the cheesecake from the springform pan, slice into portions, and serve immediately, enjoying the creamy, chocolatey delight.
- Store Leftovers: Keep any leftover cheesecake in an airtight container in the refrigerator for up to 4 days. You may also freeze slices for up to 3 months; thaw overnight in the fridge before serving.
Notes
- Ensure the cream cheese is at room temperature for a smooth batter without lumps.
- Do not overwhip the cream; it should reach soft peaks for best texture.
- The frozen Nutella disk helps create a gooey center and keeps the Nutella layer neat and contained.
- Use a springform pan for easy removal.
- For best results, chill overnight to allow the cheesecake to fully set.
- Crush Oreos without cream filling for decoration to prevent sogginess.
- This cheesecake is best served chilled but can be brought to room temperature for a softer texture.
Nutrition
- Serving Size: 1 slice (1/8 of cake)
- Calories: 480 kcal
- Sugar: 32 g
- Sodium: 180 mg
- Fat: 35 g
- Saturated Fat: 15 g
- Unsaturated Fat: 15 g
- Trans Fat: 0.2 g
- Carbohydrates: 37 g
- Fiber: 2 g
- Protein: 7 g
- Cholesterol: 80 mg
Keywords: no bake cheesecake, Nutella cheesecake, Oreo crust, easy dessert, no bake dessert, chocolate cheesecake, creamy cheesecake