Decadent Chocolate Ice Cream Sandwich Cake Recipe
Introduction
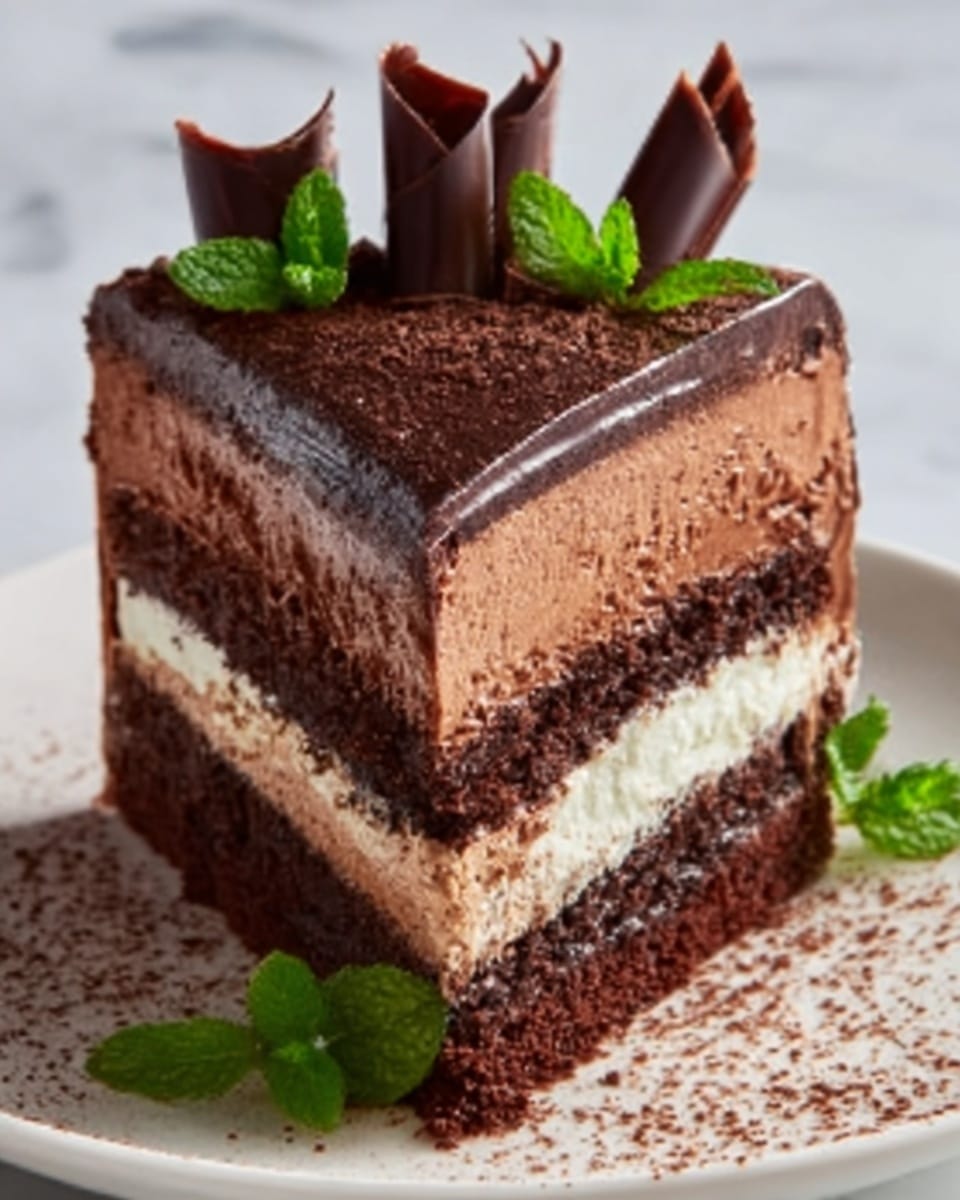
This Decadent Chocolate Ice Cream Sandwich Cake is a show-stopping dessert perfect for chocolate lovers. Layers of creamy chocolate ice cream and classic ice cream sandwiches are topped with whipped cream, chocolate sauce, and sprinkles for a delightful treat that’s easy to assemble and sure to impress.
Ingredients
- Chocolate ice cream (softened)
- Ice cream sandwiches
- Chocolate sauce
- Whipped cream
- Sprinkles or nuts (for garnish)
Instructions
- Step 1: Arrange a layer of ice cream sandwiches in a rectangular or square baking dish, fitting them snugly together to form a solid base.
- Step 2: Let the chocolate ice cream soften for about 10 minutes at room temperature, then spread a generous, even layer over the ice cream sandwiches.
- Step 3: Add another layer of ice cream sandwiches on top of the chocolate ice cream and press gently to adhere.
- Step 4: Repeat layering chocolate ice cream and ice cream sandwiches until you have three layers of sandwiches and two layers of ice cream.
- Step 5: Spread a thick layer of whipped cream over the final layer of sandwiches to finish the top of the cake.
- Step 6: Drizzle chocolate sauce over the whipped cream and sprinkle with your choice of sprinkles or nuts for added texture and decoration.
- Step 7: Cover the assembled cake with plastic wrap and freeze for at least 4 hours until firm and well set.
- Step 8: Cut into squares or rectangles to serve and enjoy your indulgent treat.
Tips & Variations
- For extra richness, use chocolate fudge sauce instead of plain chocolate sauce.
- Try adding crushed cookies or brownie pieces between layers for added texture.
- Use dairy-free ice cream and whipped cream to make a vegan version.
- Allow the softened ice cream to spread easily by leaving it at room temperature until just soft, not melted.
Storage
Store any leftover cake tightly covered in the freezer for up to one week. To serve, let it sit at room temperature for 5–10 minutes for easier slicing. Re-freeze any unused portions promptly to maintain texture and flavor.
How to Serve
Serve this delicious recipe with your favorite sides.
FAQs
Can I use different flavors of ice cream?
Yes, feel free to experiment with flavors like mint chocolate chip or cookies and cream to customize your cake. Just make sure the ice cream sandwiches complement your chosen flavor for a balanced taste.
How long should I let the cake thaw before serving?
Let the cake thaw at room temperature for about 5 to 10 minutes to soften slightly before cutting. This makes slicing easier without losing the cake’s shape or texture.
PrintDecadent Chocolate Ice Cream Sandwich Cake Recipe

This Decadent Chocolate Ice Cream Sandwich Cake is a luscious layered dessert perfect for chocolate lovers. Combining layers of chocolate ice cream sandwiches and softened chocolate ice cream, finished with whipped cream, chocolate sauce, and sprinkles or nuts, it’s a no-bake, freezer-friendly treat that’s easy to assemble and sure to impress at any gathering.
- Prep Time: 15 minutes
- Cook Time: 0 minutes
- Total Time: 4 hours 15 minutes
- Yield: 12 servings
- Category: Dessert
- Method: No-Cook
- Cuisine: American
Ingredients
Chocolate Ice Cream Sandwich Cake Ingredients
- Ice Cream Sandwiches – enough to form about 3 layers (approximately 15-18 sandwiches)
- Chocolate Ice Cream – 1.5 to 2 quarts, softened for 10 minutes
- Whipped Cream – 2 cups, for topping
- Chocolate Sauce – 1/2 cup, for drizzling
- Sprinkles or Nuts – 1/4 cup, for garnish
Instructions
- Prepare Your Base: Start by arranging a layer of chocolate ice cream sandwiches in a rectangular or square baking dish. Fit them snugly to form a solid base that will support the layers above.
- Layer with Ice Cream: Let the chocolate ice cream soften at room temperature for about 10 minutes. Then spread a generous, even layer over the base of ice cream sandwiches, smoothing it carefully for an even surface.
- Add More Sandwiches: Place another layer of ice cream sandwiches on top of the softened chocolate ice cream. Press gently to ensure the sandwiches adhere properly and create a compact layer.
- Repeat Layers: Repeat the layering with chocolate ice cream and ice cream sandwiches until you have about three layers of sandwiches and two layers of chocolate ice cream, or until desired cake height is reached.
- Finish with Whipped Cream: Spread a thick, even layer of whipped cream over the final ice cream sandwich layer to create a creamy, luscious top.
- Decorate: Drizzle chocolate sauce generously over the whipped cream and sprinkle with your choice of sprinkles or chopped nuts for added texture and visual appeal.
- Freeze: Cover the dish with plastic wrap or an airtight lid and freeze the cake for at least 4 hours, or until it is completely firm to ensure clean slicing and proper layering.
- Serve: When ready, remove from freezer and cut into squares or rectangles using a sharp knife. Serve immediately and enjoy your indulgent chocolate ice cream sandwich cake.
Notes
- For best results, soften the chocolate ice cream just enough to spread easily but not melt completely.
- You can swap chocolate ice cream for vanilla or any other flavor to customize the dessert.
- Use a warm knife for cleaner cuts by dipping it in hot water and wiping dry before slicing the cake.
- Store leftovers tightly covered in the freezer and consume within 3 days for optimal freshness.
- To make it nut-free, skip the nuts and use only sprinkles or other toppings.
Keywords: Chocolate Ice Cream Sandwich Cake, No-Bake Cake, Layered Ice Cream Dessert, Chocolate Dessert, Frozen Cake