Beginner Sourdough Bread Recipe
Introduction
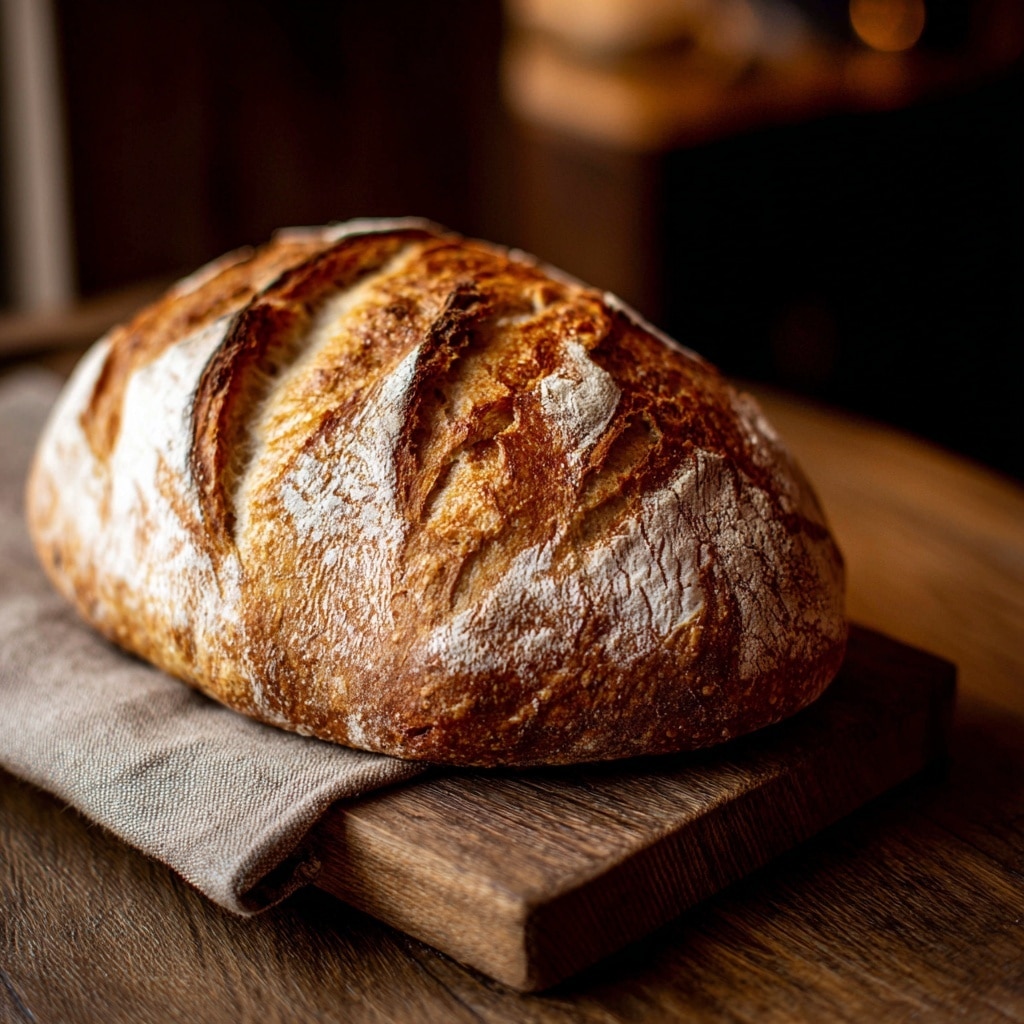
Begin your sourdough journey with this simple and rewarding Beginner Sourdough Bread recipe. With just a few ingredients and some patience, you’ll bake a crusty loaf full of flavor that’s perfect for any meal.
Ingredients
- To make ¼ cup (50 g) of active sourdough starter:
- 2 teaspoons (10 g) sourdough starter
- 3 tablespoons (25 g) all-purpose flour
- 5 teaspoons (25 g) water
- Dough Ingredients:
- ¼ cup (50 g) active sourdough starter (100% hydration)
- 1 ⅓ cups + 2 tablespoons (350 g) water
- 2 teaspoons (10 g) fine sea salt
- 4 cups + 2 tablespoons (500 g) bread flour
Instructions
- Step 1: Feed your sourdough starter by mixing 2 teaspoons starter, 3 tablespoons flour, and 5 teaspoons water in a clean jar. Stir, loosely cover, and leave at room temperature for 12 hours until it doubles in size and bubbles appear.
- Step 2: In a large bowl, combine 50 g active starter with 350 g water. Stir to distribute starter evenly.
- Step 3: Add 500 g bread flour and 10 g sea salt. Mix with a stiff spatula or hands until a shaggy dough forms with no dry flour remaining. Cover and rest for 1 hour.
- Step 4: Perform a stretch and fold: wet your hand, stretch one side of the dough over itself, turn the bowl a quarter, and repeat until full circle. Form a tight ball. Cover and rest 30 minutes.
- Step 5: Repeat the stretch and fold once more to develop dough strength.
- Step 6: Cover the bowl and let the dough rise 7-10 hours at room temperature. It should increase 50–75%, not double.
- Step 7: Turn dough onto a floured surface. Shape into a ball by folding sides into the center and flipping seam-side down. Cup and twist the dough to tighten the outer skin.
- Step 8: Place shaped dough seam-side down on parchment paper inside a bowl. Cover with a tea towel and let rise 1–2 hours. Use your thumb to test—if the indentation springs back fully, it needs more time.
- Step 9: Preheat oven with Dutch oven inside to 450°F (232°C) for 30 minutes before baking.
- Step 10: Carefully remove hot Dutch oven, take the lid off, score the dough’s surface with a sharp knife or razor, and transfer dough in parchment to the Dutch oven.
- Step 11: Cover and bake 20 minutes. Remove lid and bake 25–30 minutes more until crust is golden and internal temperature reaches 205–210°F (96–99°C).
- Step 12: Cool bread on a rack for 1–2 hours before slicing to finish cooking and avoid a gummy texture.
Tips & Variations
- Use room temperature water (around 70°F/21°C) for best fermentation results.
- Try adding whole wheat or rye flour for different flavors and textures.
- For more flavor, refrigerate the dough overnight during bulk fermentation for a slower rise.
- Use a razor blade to score for clean, precise cuts that help control the loaf’s expansion.
Storage
Store sourdough at room temperature wrapped in a kitchen towel, beeswax wrap, or in a bread bag to maintain crustiness. Avoid refrigeration, which dries bread out quickly. Freeze whole loaves or slices tightly wrapped in plastic and placed in freezer-safe bags for up to 3 months. To reheat, thaw at room temperature and warm briefly in the oven.
How to Serve
Serve this delicious recipe with your favorite sides.
FAQs
How do I know when my sourdough starter is ready to use?
Your starter is ready when it has doubled in size and is bubbly on the surface and sides of the jar. It should smell pleasantly sour and fresh.
Why is my sourdough bread dense or gummy inside?
This usually happens if you slice the bread before it has cooled completely or if the dough is under-proofed or over-proofed. Be patient and allow full cooling before cutting, and adjust fermentation times as needed based on dough behavior.
PrintBeginner Sourdough Bread Recipe
This Beginner Sourdough Bread recipe guides you through making an active sourdough starter and transforming it into a deliciously crusty and flavorful loaf. Designed for novice bakers, it covers essential steps like feeding the starter, mixing, fermenting, shaping, scoring, and baking in a Dutch oven to achieve the perfect artisan bread with a chewy crumb and golden crust.
- Prep Time: 12 hours (including starter fermentation), Active prep approx. 30 minutes
- Cook Time: 45-50 minutes
- Total Time: Approximately 13 hours (includes starter fermentation and dough rising times)
- Yield: 1 medium loaf (about 1 to 1.2 pounds / 450–550 grams bread) 1x
- Category: Bread
- Method: Baking
- Cuisine: American
Ingredients
Sourdough Starter Ingredients
- 2 teaspoons (10 g) active sourdough starter
- 3 tablespoons (25 g) all-purpose flour
- 5 teaspoons (25 g) water
Dough Ingredients
- ¼ cup (50 g) active sourdough starter (100% hydration)
- 1 ⅓ cups + 2 tablespoons (350 g) water
- 2 teaspoons (10 g) fine sea salt
- 4 cups + 2 tablespoons (500 g) bread flour
Instructions
- Feed your Sourdough Starter: About 12 hours before mixing your dough, combine 2 teaspoons sourdough starter, 3 tablespoons all-purpose flour, and 5 teaspoons water in a clean jar. Stir well, cover loosely, and leave at room temperature. The starter is ready when doubled in size with bubbles visible on the surface and jar sides.
- Mix the Dough: In a large bowl, mix 50 g active starter with 350 g water until evenly distributed. Add 500 g bread flour and 10 g sea salt. Mix with a stiff spatula or hands until a shaggy mass forms with no dry flour left.
- Rest the Dough: Cover bowl and let the dough rest at room temperature for 1 hour to start gluten development.
- Stretch and Fold #1: Moisten your hand and stretch one side of the dough over itself, rotating the bowl until a full circle of folds is completed. This tightens the dough. Cover and rest for 30 minutes.
- Stretch and Fold #2: Repeat the stretch and fold procedure again to build strength. Cover and allow the dough to bulk ferment on the counter for 7-10 hours, until it rises about 50-75% but does not double.
- Shape and Second Rise: Turn dough onto lightly floured surface. Shape into a ball by pulling sides into the middle, then flip seam-side down. Cup the dough, pulling and twisting to form a tight skin. Place dough seam-side down on parchment paper, lift and transfer into a medium-sized bowl. Cover and rest 1-2 hours at room temperature until nearly springy when indented.
- Preheat Oven and Dutch Oven: Half an hour before baking, preheat oven to 450°F (232°C) with Dutch oven inside to get thoroughly hot.
- Score and Bake: Using gloves, remove Dutch oven, take off lid. Score dough top with razor or sharp knife. Transfer dough with parchment paper into Dutch oven, cover with lid. Bake 20 minutes covered, then remove lid and bake additional 25-30 minutes until crust is golden brown and internal temperature reaches 205-210°F (96-99°C).
- Cool the Bread: Remove bread and set on a wire rack to cool for 1-2 hours before slicing to allow the crumb to set and prevent gummy texture.
- Store Properly: Store bread at room temperature wrapped in a bread bag or cloth, avoid refrigeration. For longer storage, freeze whole loaves or sliced portions tightly wrapped for up to 3 months.
- Serve: Enjoy warm with homemade butter, Nutella, or strawberry jam for the best flavor experience.
Notes
- The starter is made slightly more than needed because some adheres to jar sides during transfer.
- If the dough doubles in size or is hard to shape after bulk fermentation, it may be over-proofed; shorten rising time next bake.
- Use wet hands to prevent dough sticking during stretch and fold.
- Preheating the Dutch oven is essential for creating steam and a crispy crust.
- Letting the bread cool completely before slicing ensures ideal crumb texture.
- Do not refrigerate bread to maintain crust crispness and freshness.
Keywords: sourdough bread, beginner sourdough, homemade bread, artisan bread, Dutch oven bread, fermented bread