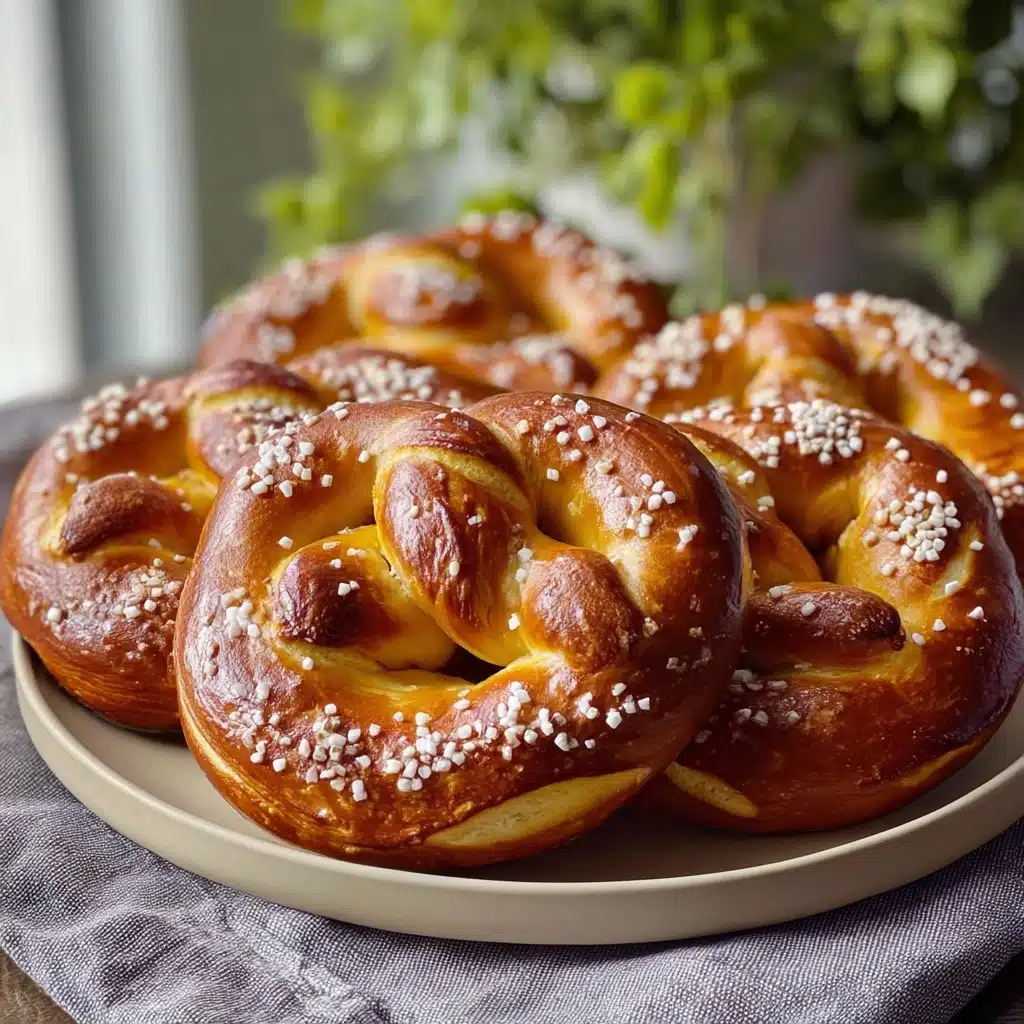
Easy Homemade Soft Pretzels Recipe
If you’ve ever craved that warm, chewy, and slightly salty snack from your favorite local bakery, you are going to love this Easy Homemade Soft Pretzels recipe. These pretzels strike just the right balance between a golden crust and a tender, fluffy interior, all made with simple pantry staples. Whether for a cozy night in, a party appetizer, or just a fun baking project, making these soft pretzels from scratch is surprisingly straightforward and incredibly rewarding. Let me guide you through the process to create that comforting, fresh-out-of-the-oven indulgence right in your own kitchen.

Ingredients You’ll Need
Getting your ingredients right is the first delicious step to perfect Easy Homemade Soft Pretzels. Each one plays a crucial role, whether it’s helping your dough rise beautifully, giving the pretzels that iconic chewy texture, or creating that irresistible golden finish.
- 4 cups all-purpose flour: The backbone of your pretzel dough, it provides structure and chewiness.
- 1 packet active dry yeast (2¼ teaspoons): This little powerhouse makes your dough rise, creating that soft, airy crumb inside.
- 1 tablespoon sugar: Feeds the yeast and adds a subtle touch of sweetness to balance the saltiness.
- 1½ cups warm water (110°F/43°C): Activates the yeast and hydrates the flour—temperature is key here!
- ¾ cup baking soda (for boiling): Creates the classic pretzel crust by reacting with the dough surface before baking.
- Coarse salt (for topping): Adds that signature punch of flavor and a satisfying crunch.
How to Make Easy Homemade Soft Pretzels
Step 1: Activate the Yeast
Start by combining warm water, sugar, and yeast in a large mixing bowl. The warmth wakes up the yeast, and the sugar gives it nourishment to bubble up into a foamy, inviting mixture. This bubbling signals that your dough will rise beautifully, which is the heart of fluffy soft pretzels.
Step 2: Mix in the Flour and Salt
Once your yeast mixture is foamy, gradually add the all-purpose flour and a pinch of salt. Mixing these together forms your dough, starting to build the elasticity needed for that iconic pretzel texture. Take your time to combine everything well before moving on to kneading.
Step 3: Knead the Dough
Turn your dough out onto a floured surface and knead it for about five minutes until it becomes smooth and elastic. This step strengthens the gluten strands, giving you pretzels with a hearty chew and structure that’s just right.
Step 4: Let the Dough Rise
Pop your dough into a greased bowl, cover it with a damp cloth, and let it rest in a warm spot. After about an hour, it should have doubled in size. This rest time allows the yeast to work its magic fully, improving flavor and texture.
Step 5: Shape the Pretzels
Preheat your oven to 450°F (232°C). Divide your risen dough into equal pieces, then roll each piece into a long rope about 24 inches long. Twist the ropes into that classic pretzel shape—it’s both therapeutic and fun!
Step 6: Boil in Baking Soda Water
Boiling your shaped pretzels in a pot of water infused with baking soda for about 30 seconds each sets the crust and encourages the magnificent golden color during baking. Don’t skip this step; it’s essential to achieving that authentic pretzel look and taste.
Step 7: Bake to Golden Perfection
Place the boiled pretzels on parchment-lined baking sheets, sprinkle generously with coarse salt, and bake for 12 to 15 minutes until they’re golden brown. Your kitchen will smell amazing, and your Easy Homemade Soft Pretzels will be ready to devour.
How to Serve Easy Homemade Soft Pretzels
Garnishes
The beauty of soft pretzels is how customizable they are after baking. A sprinkle of coarse salt is classic, but you can also brush them with melted butter and add garlic powder, cinnamon sugar, or even grated cheese for a flavorful twist. These garnishes instantly elevate your pretzels to snacktime royalty.
Side Dishes
Soft pretzels are fantastic alongside a variety of dips and sides—think tangy mustard, creamy cheese sauce, or even a rich beer cheese dip. They pair wonderfully with soups and stews or can be left to shine solo for a satisfying, carb-rich treat.
Creative Ways to Present
For a fun gathering, serve your pretzels with multiple dipping bowls or turn them into mini pretzel bites for easy snacking. Wrapping them with a slice of ham and cheese creates a savory sandwich, perfect for brunch or an on-the-go meal. The possibilities are as endless as your imagination!
Make Ahead and Storage
Storing Leftovers
If you happen to have extras (though unlikely!), wrap leftover pretzels tightly in plastic wrap or keep them in an airtight container. Stored at room temperature, they stay soft for a day or two, making for quick and delicious snacks the next day.
Freezing
Easy Homemade Soft Pretzels freeze beautifully. After baking, let them cool completely, then place them in freezer bags with parchment paper between each pretzel to prevent sticking. When you want a treat, just thaw and reheat.
Reheating
The best way to bring stored pretzels back to life is by warming them in a 350°F (175°C) oven for about 5 to 7 minutes. This refreshes the crust’s crispness and restores that mouthwatering softness inside, just like freshly baked.
FAQs
Can I use whole wheat flour instead of all-purpose flour?
Absolutely! You can substitute whole wheat for all or part of the flour. Keep in mind, it may result in a denser pretzel with a nuttier flavor, but it’s a wholesome variation that tastes wonderful.
Why do I need to boil the pretzels in baking soda water?
Boiling in baking soda water is key to achieving that iconic chewy crust and deep brown color. It creates an alkaline environment that changes the dough’s surface, making your pretzels authentic and absolutely delicious.
My dough didn’t rise much. What went wrong?
The most common culprit is water temperature. If it’s too hot or too cold, yeast won’t activate properly. Always aim for warm water around 110°F (43°C) to wake the yeast without killing it.
Can I add flavors like cinnamon or cheese to the dough?
You can get creative with your dough! Adding cinnamon and sugar after boiling or mixing cheese into the topping works best to keep that classic texture, but feel free to experiment with small batches first.
How long do Easy Homemade Soft Pretzels stay fresh?
They are best eaten the day they’re made for optimal softness and flavor, but when stored properly, they can last up to two days at room temperature and longer if frozen.
Final Thoughts
Making Easy Homemade Soft Pretzels from scratch is one of those kitchen adventures that reward you with comforting, tasty results every time. Once you try this recipe, you’ll find it hard to go back to store-bought versions because nothing beats the warm, salty, chewy perfection of freshly baked pretzels. So grab your bowl and get ready to twist, boil, and bake your way to a snack that will delight everyone around your table. Trust me—you’ll want to make these again and again!
PrintEasy Homemade Soft Pretzels Recipe

This Easy Homemade Soft Pretzels recipe delivers warm, chewy pretzels with a golden crust, perfect for snacking or serving with your favorite dips. Made from simple pantry staples and boiled in a baking soda bath for that classic pretzel texture and flavor, these soft pretzels are a delightful treat to enjoy fresh out of the oven.
- Prep Time: 15 minutes
- Cook Time: 20 minutes
- Total Time: 1 hour 35 minutes
- Yield: 8 soft pretzels 1x
- Category: Snack
- Method: Boiling, Baking
- Cuisine: American
- Diet: Vegetarian
Ingredients
Dough Ingredients
- 4 cups all-purpose flour
- 1 packet active dry yeast (2¼ teaspoons)
- 1 tablespoon sugar
- 1½ cups warm water (110°F/43°C)
- 1 teaspoon salt (for dough)
Boiling and Topping
- ¾ cup baking soda (for boiling)
- Coarse salt (for topping, to taste)
Instructions
- Activate Yeast: In a large mixing bowl, combine warm water, sugar, and yeast; let sit until the mixture becomes foamy, about 5 minutes, indicating that the yeast is active.
- Make Dough: Gradually mix in the flour and salt into the yeast mixture until a dough forms, combining all ingredients thoroughly.
- Knead Dough: Turn the dough onto a floured surface and knead for about 5 minutes until the dough is smooth, elastic, and no longer sticky.
- Proof Dough: Place the dough in a greased bowl, cover it with a damp cloth, and let it rise in a warm spot until doubled in size, approximately 1 hour.
- Preheat Oven and Shape Pretzels: Preheat your oven to 450°F (232°C). Divide the risen dough into equal portions, roll each into a long rope about 24 inches long, then twist each into the classic pretzel shape.
- Boil Pretzels: Bring a large pot of water to a boil and add the baking soda. Boil each pretzel for about 30 seconds to create the distinctive chewy crust and flavor. Remove carefully with a slotted spoon.
- Bake Pretzels: Place the boiled pretzels on baking sheets lined with parchment paper, sprinkle generously with coarse salt, and bake for 12-15 minutes or until they are golden brown.
Notes
- Use warm water (about 110°F/43°C) to properly activate the yeast without killing it.
- Boiling pretzels in baking soda water is essential for that traditional pretzel crust and flavor.
- Let the dough rise until doubled – this ensures a light and fluffy texture.
- Coarse salt on top adds crunch and saltiness; adjust quantity according to taste.
- Serve pretzels warm with mustard, cheese sauce, or your favorite dip.
- Store leftovers in an airtight container; refresh by reheating in the oven.
Nutrition
- Serving Size: 1 pretzel
- Calories: 250 kcal
- Sugar: 2 g
- Sodium: 600 mg
- Fat: 3 g
- Saturated Fat: 0.5 g
- Unsaturated Fat: 2 g
- Trans Fat: 0 g
- Carbohydrates: 50 g
- Fiber: 2 g
- Protein: 7 g
- Cholesterol: 0 mg
Keywords: soft pretzels recipe, homemade pretzels, easy pretzels, baking soda pretzels, chewy pretzels, snack recipes